

For Creators building or editing a Space's 3D scene.
Using the Studio
Learn the Studio layout, how to select and transform objects, how to save, and how draft and publish work.
Overview
The Studio is the 3D editor where you build your exhibition: the room, the artworks on the walls, lighting, environment, and camera. This page covers the basics — getting around, saving, and publishing. For building content, see Add and arrange content, Lighting & environment, and Camera, viewpoints & motion.
The layout
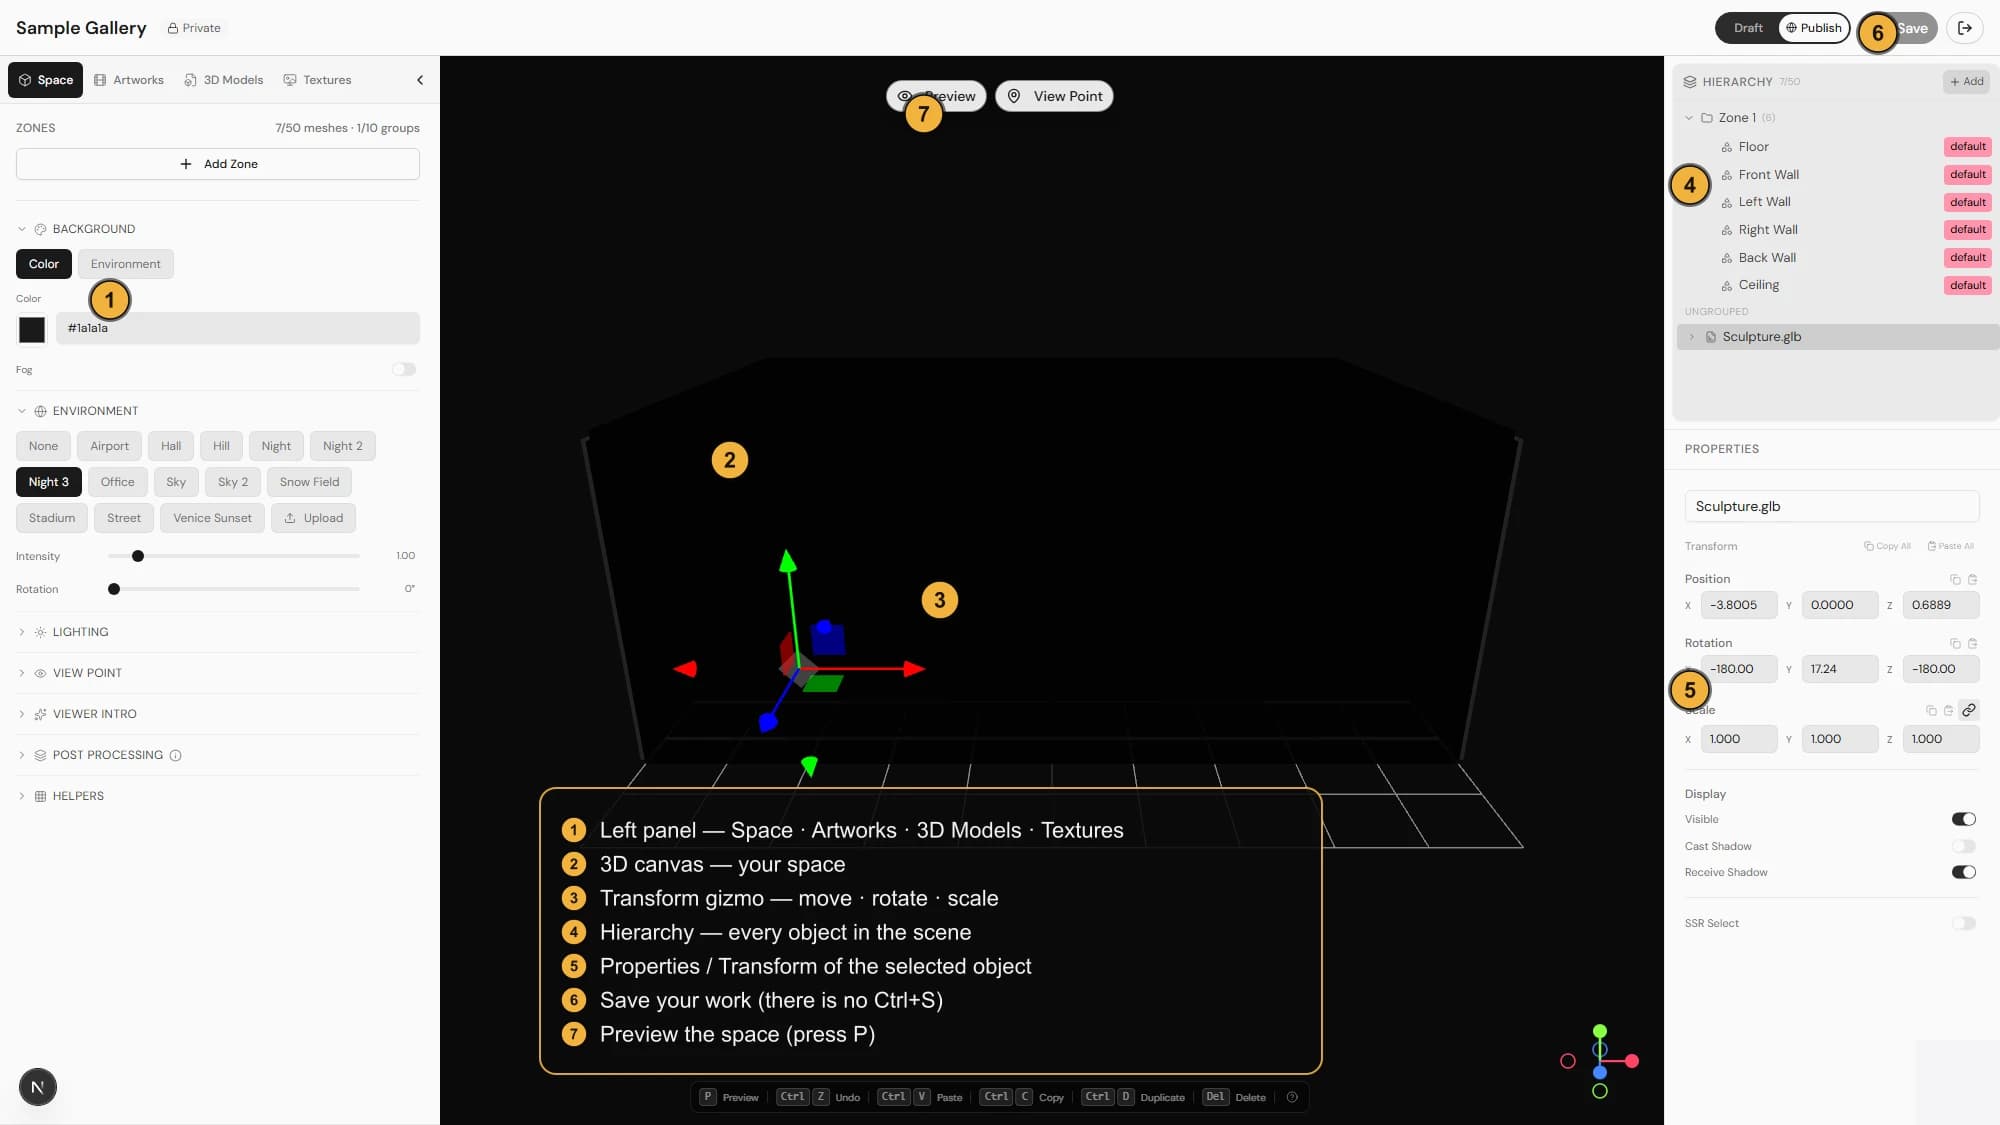
The Studio has three main areas:
- Left panels — your building blocks: the Space panel (room/zone, environment, post-processing, viewpoints), and the Artworks, 3D Models, and Textures panels for adding media.
- The 3D canvas in the center — where your exhibition takes shape.
- Right side — the Hierarchy (an outliner listing every object in your scene) plus a properties panel for editing whatever you've selected.
Selecting and transforming objects
- 1Click an object in the canvas, or click its name in the Hierarchy, to select it. Clicking again where objects overlap cycles through them; click empty space to deselect.
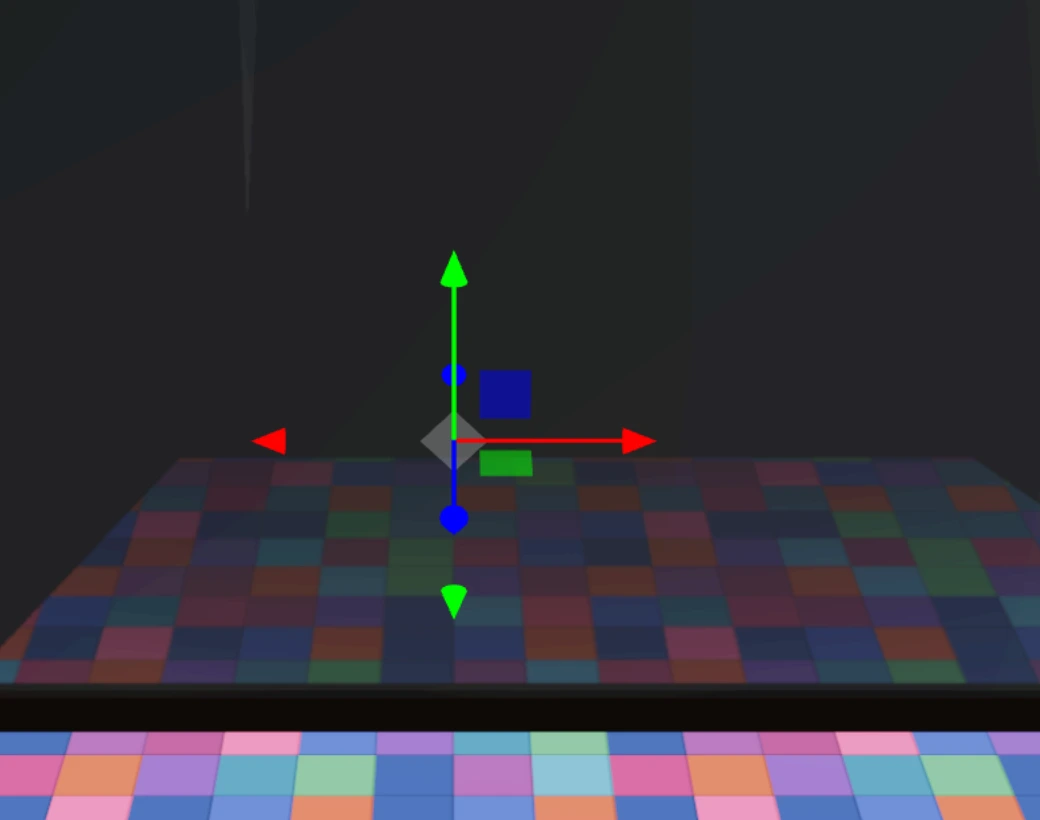
- 2Use the on-screen gizmo to move, rotate, or scale by dragging — press W for move, E for rotate, R for scale.
- 3For precise placement, type exact position, rotation, and scale values in the properties panel. Every object type has its own settings — see Object properties.
- 4Press F to focus the camera on the selection. Use the keyboard shortcuts below to copy, duplicate, delete, or undo as you work.
Saving
Save your work with the Save button at the top-right of the editor. Saving stores your full 3D configuration — the room, objects, materials, lighting, environment, and camera.
There is no Ctrl+S shortcut and no autosave. You must use the Save button. If you try to leave the Studio with unsaved changes, the editor warns you first so you don't lose work.
Saving does not change whether your Space is a Draft or Published. Draft/Publish is a separate control (below).
Draft vs Publish
Every Space stays a Draft until you publish it. The Draft/Publish control is a toggle in the Studio's top bar, separate from Save.
- 1Build your exhibition and Save as you go (drafts are saved like any other change).
- 2When it's ready, switch the top-bar toggle to Publish and Save to apply it.
- 3To take it back offline, switch the toggle back to Draft.

Publishing is blocked until your Space has both a thumbnail and a Zone (the room structure). If either is missing, the Studio tells you what's needed. Add a thumbnail via the upload step or Edit details, and add a Zone in the Space panel — see Build the room with Zones.
Preview
Press P to toggle Preview, which shows your Space the way a visitor will experience it — walk around, look at the artworks, and check the camera. Press P again to return to editing.
- Move with W / A / S / D, look around by dragging, and click a spot to walk to it (on touch devices, drag or use the gyroscope, and tap to move).
- The bottom viewer controls play/pause and scrub videos, set their volume, jump between viewpoints, and pick the video quality (Auto by default).
- A small help button lists these controls, and a first-time "How to Use Studio" guide points you to placing artworks, setting a viewpoint, and publishing.
Keyboard shortcuts
These are the shortcuts the Studio supports (on Mac, use Cmd in place of Ctrl):
- W / E / R — switch the gizmo to move / rotate / scale
- F — focus the camera on the selected object
- P — toggle Preview
- Ctrl/Cmd + C — copy the selected object (basic shapes, lights, and projectors)
- Ctrl/Cmd + V — paste
- Ctrl/Cmd + D — duplicate the selected object
- Delete or Backspace — delete the selected object
- Esc — exit Preview or mapping, and clear the selection
- Ctrl/Cmd + Z — undo
- Ctrl/Cmd + Y — redo
- Ctrl + Shift + / — toggle the debug overlay (FPS monitor)
Press ? in the Studio to open a panel listing the available shortcuts.