

For Creators shaping how visitors experience and move through a Space.
Camera, viewpoints & motion
Set where visitors start and how they move through a Space — eye level, viewpoints, the intro camera, and idle motion.
Overview
Beyond how a Space looks, this is where you shape how visitors experience it: where they start, the viewpoints they can jump between, and the camera motion that plays when the Space opens or is left idle. These controls live in the Space panel's View Point and Viewer Intro sections. For the look itself — lighting, environment, and effects — see Lighting & environment. Remember to Save with the top-right button as you go.
Camera and viewpoints
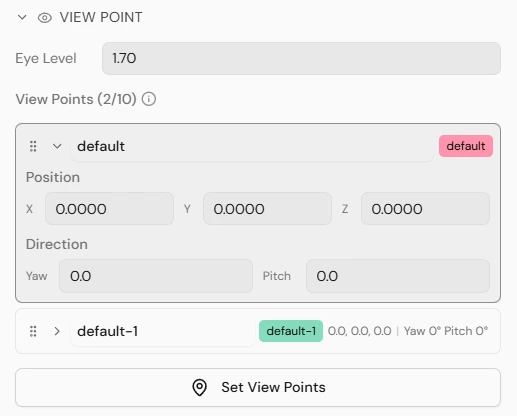
Open the Space panel → View Point to control how visitors move and where they look.
- 1Set the Eye level — the visitor's standing height.
- 2Viewpoints are created together with Tracks — each Track you add gets its own linked viewpoint (there is no separate "add viewpoint" button). With no Track, a single Default viewpoint is used. You can have up to about 10.
- 3Select a viewpoint to edit it: rename it, set its Position, and aim it with Yaw (turn left/right) and Pitch (look up/down).
- 4Use Set view points to place a viewpoint by looking around in the scene and capturing the current view, instead of typing numbers.
- 5Reorder viewpoints to control the order visitors step through them; the first one is where every visitor starts.
Because viewpoints come from Tracks, adding a Track is how you add a viewpoint — for example by keeping with a Track checked when you add a Zone, or when you sync screens. See Sync playback with Tracks.
While placing viewpoints (Set View Points), a navigation panel lets you tune the walk-through feel — FOV, movement Speed, Accel / Decel, and Jump to Safe Spot to drop onto a valid standing position.
Intro and idle camera motion
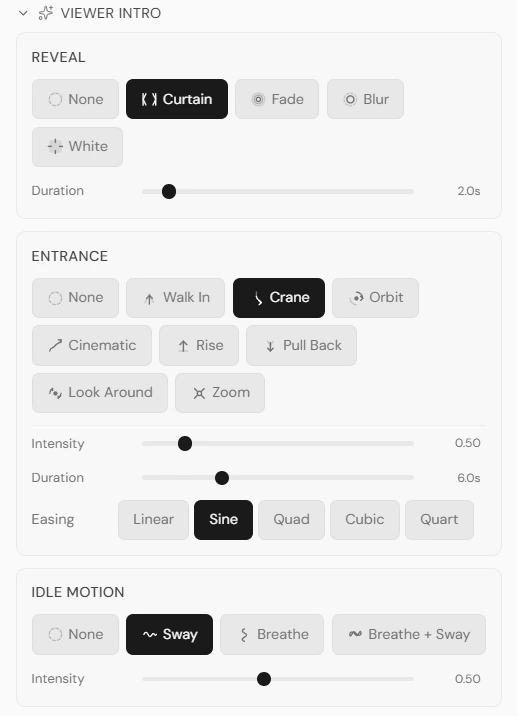
The Space panel → Viewer Intro section controls how the Space presents itself when it opens and when it is left alone. It has three parts:
Reveal
How the first frame appears as the Space loads. Choose None, Curtain, Fade, Blur, or White, and set the transition Duration.
Entrance
An optional camera move that plays once when the Space opens, for a cinematic arrival. Pick a style — Walk In, Crane, Orbit, Cinematic, Rise, Pull Back, Look Around, or Zoom — then tune its Intensity, Duration, and Easing (Linear, Sine, Quad, Cubic, or Quart) for how the motion accelerates.
Idle motion
A gentle motion that plays after a period of inactivity, so the scene feels alive even when no one is interacting. Choose Sway, Breathe, or Breathe + Sway (or None), and set its Intensity.
Notes
- Use Preview (press P) often — camera moves and viewpoints read very differently in the viewer than in the editor.
- The first viewpoint is where every visitor starts, so set it to a welcoming, well-framed view.